Everything you need to know to get started with Kube-Proxy
After reading this post, you will have a high level understanding of the kube-proxy component in the kubernetes cluster.
Background knowledge
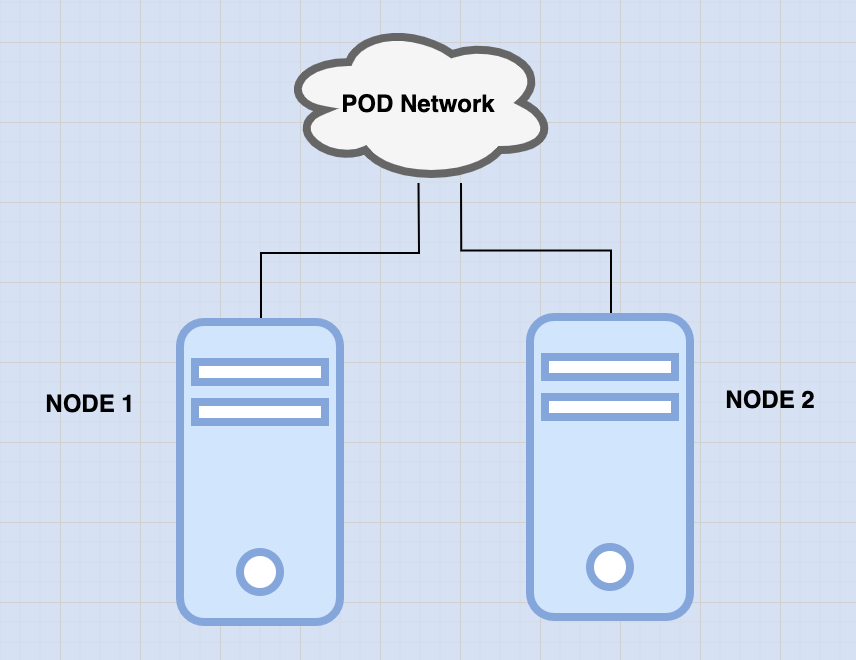
Within a kubernetes cluster, every POD can communicate with every other POD. This is accomplished by deploying a POD networking solution to the cluster.
What is a POD network?
A POD network, is an internal virtual network that spans across all the nodes in the cluster to which the PODs connect to. This network is what enables inter-POD communication. There are many solutions available for deploying such a network.
Example
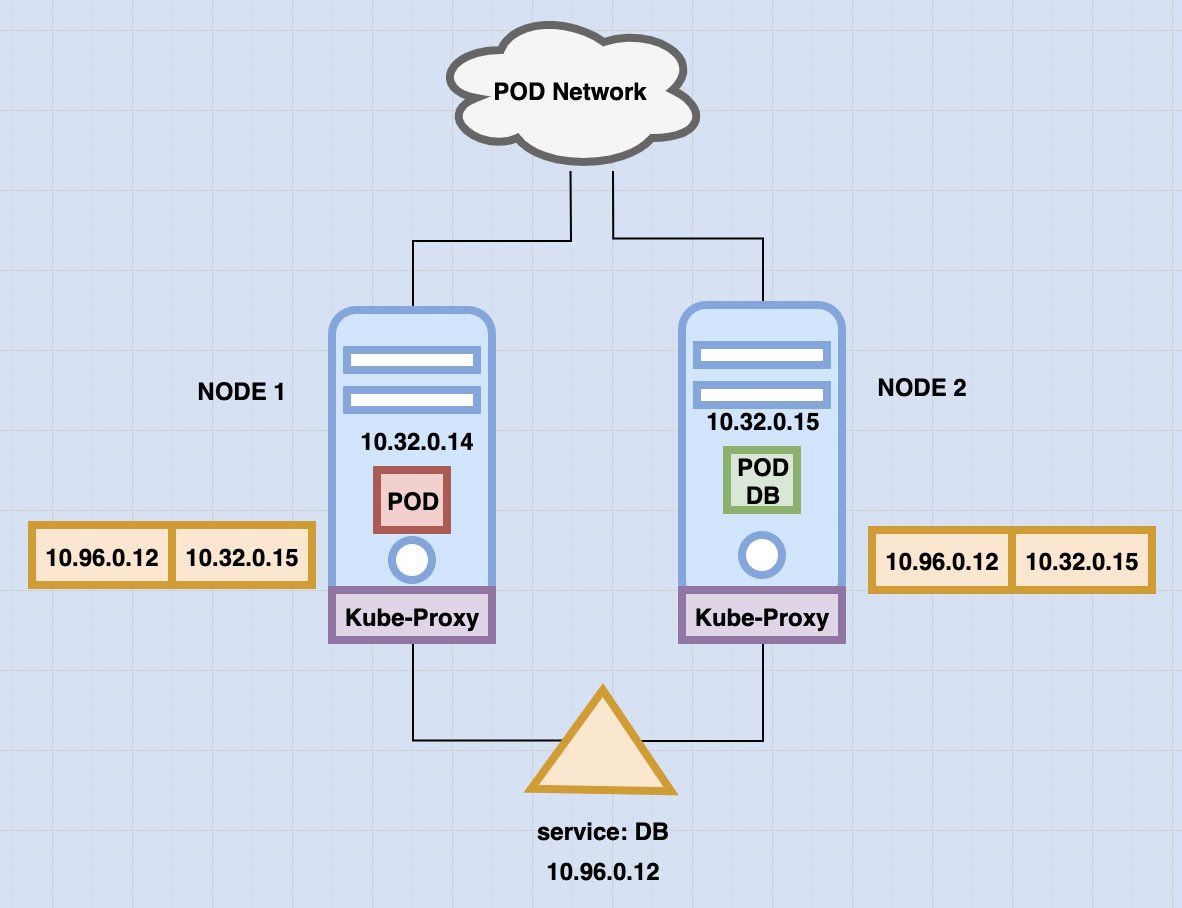
Imagine we have a web application deployed on node 1 and a database application deployed on node 2.
The web app can reach the database, simply by using the IP of the database POD.
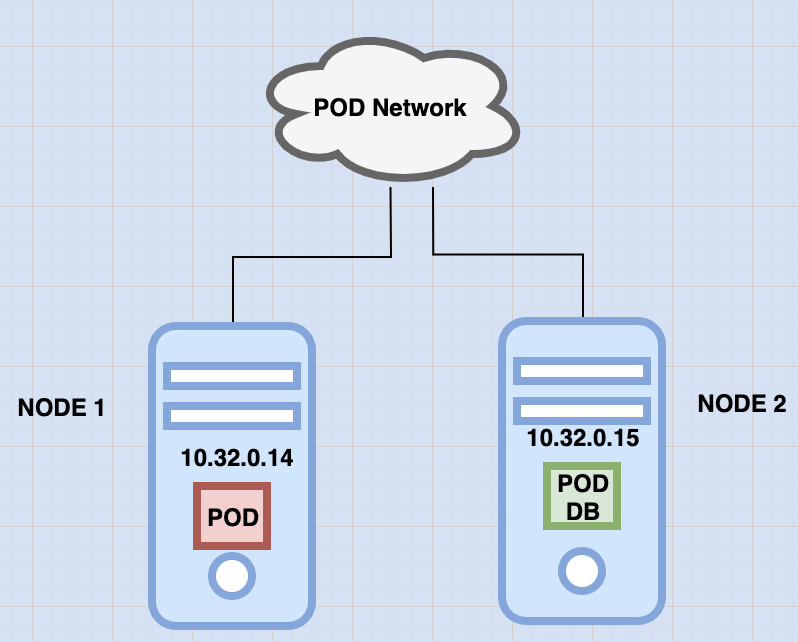
But there is no guarantee that the IP of the database POD will always remain the same.
As you may know, there is a better and more practical way for these two PODS to talk to each other via a kubernetes service.
So in this example we would create a service to expose the database POD across cluster like so:
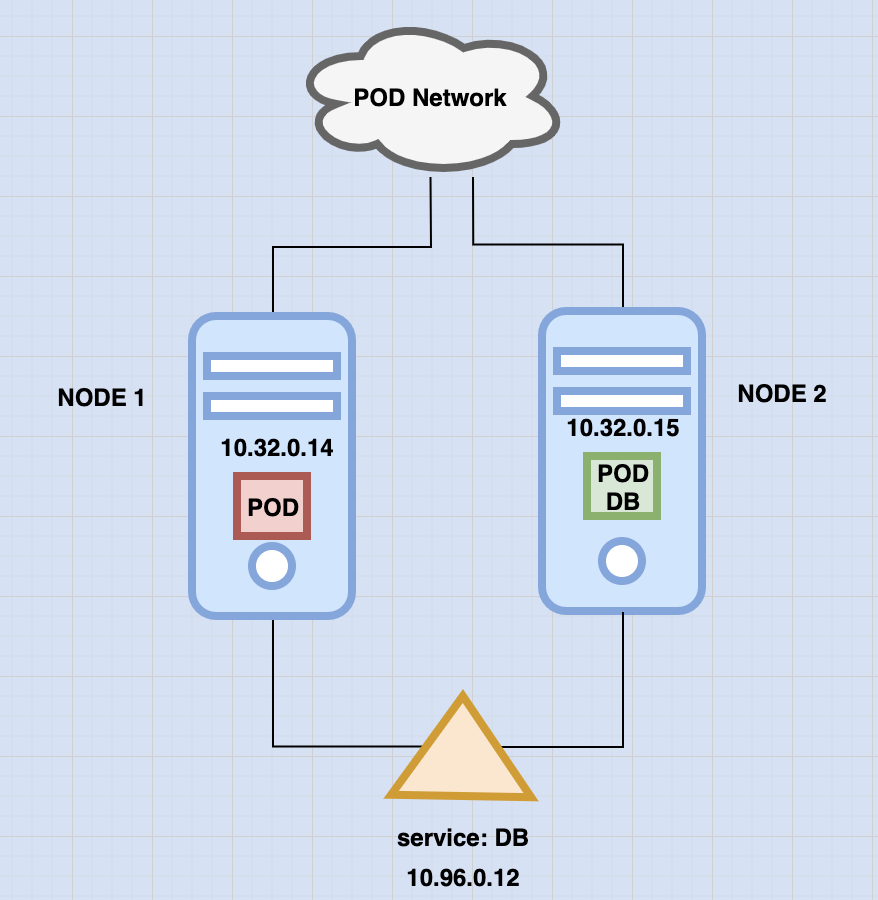
The web application can now access the database using the name of the service db.
The service also gets assigned an IP address to it. So now, whenever a pod tries to reach the service using it's IP or name, it forwards the traffic to the database.
Having said this, does the service DB join the same POD Network?
The service cannot join the POD network because the service is not a container like pod so it doesn't have any interfaces or an active listening process.
It is a virtual component that only lives in the kubernetes memory.
How does this service get exposed across the cluster?
That’s where Kube-Proxy comes in.
Kube-proxy is a process that runs on each node in the kubernetes cluster.
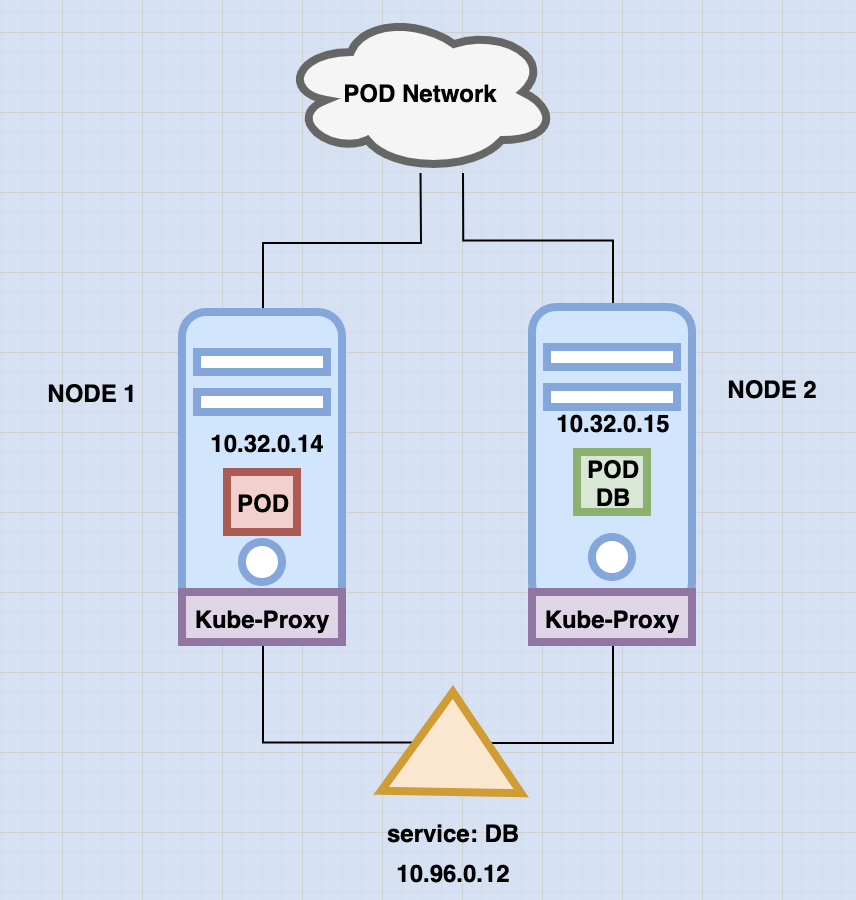
Its job is to look for new services and every time a new service is created it creates the appropriate rules on each node to forward traffic to those services to the backend pods.
One way it does this is using IPTABLE rules.
In this case, the kube-proxy creates an IP table rule on each node in the cluster to forward traffic heading to the IP of the service which is 10.96.0.12 to the IP of the actual pod which is 10.32.0.15.
So that is how kube-proxy configures the service.
We discuss a lot more about networking and services kube-proxy and POD networking in a future section. However, this high level overview will suffice for now.
How to install kube-proxy.
Download the kube-proxy binary from the kubernetes release page. Extract it and run it as a service.
wget https://storage.googleapis.com/kubernetes-release/release/v1.13.0/bin/linux/amd64/kube-proxykube-proxy.serviceThe kubeadm tool deploys kube-proxy as PODs on each node.
kubectl get pods -n kube-systemIn fact, it is deployed as a daemon set, meaning that a single POD is always deployed on each node in the cluster.
kubectl get daemonset -n kube-systemIf you don't know what daemon set is, I have another post dedicated for it. Here. Or you can view the kubernetes documentation about it.
Thank you for joining along. Happy learning.